How to record a software tutorial on a Mac
The recording is never the hard part of a screen tutorial. Take nine is. You're most of the way through, the demo finally flows, and then you notice the typo from take three is still sitting right there in the corner. So you start again.
Most screen recorders are built for the first take. The one you actually want is built for the ninth. This isn't a "press the red button" guide. It's the setup that keeps a retake from costing you anything, written for the kind of tutorial where you're demoing real software and redoing sections all day.
Lock the recording area first
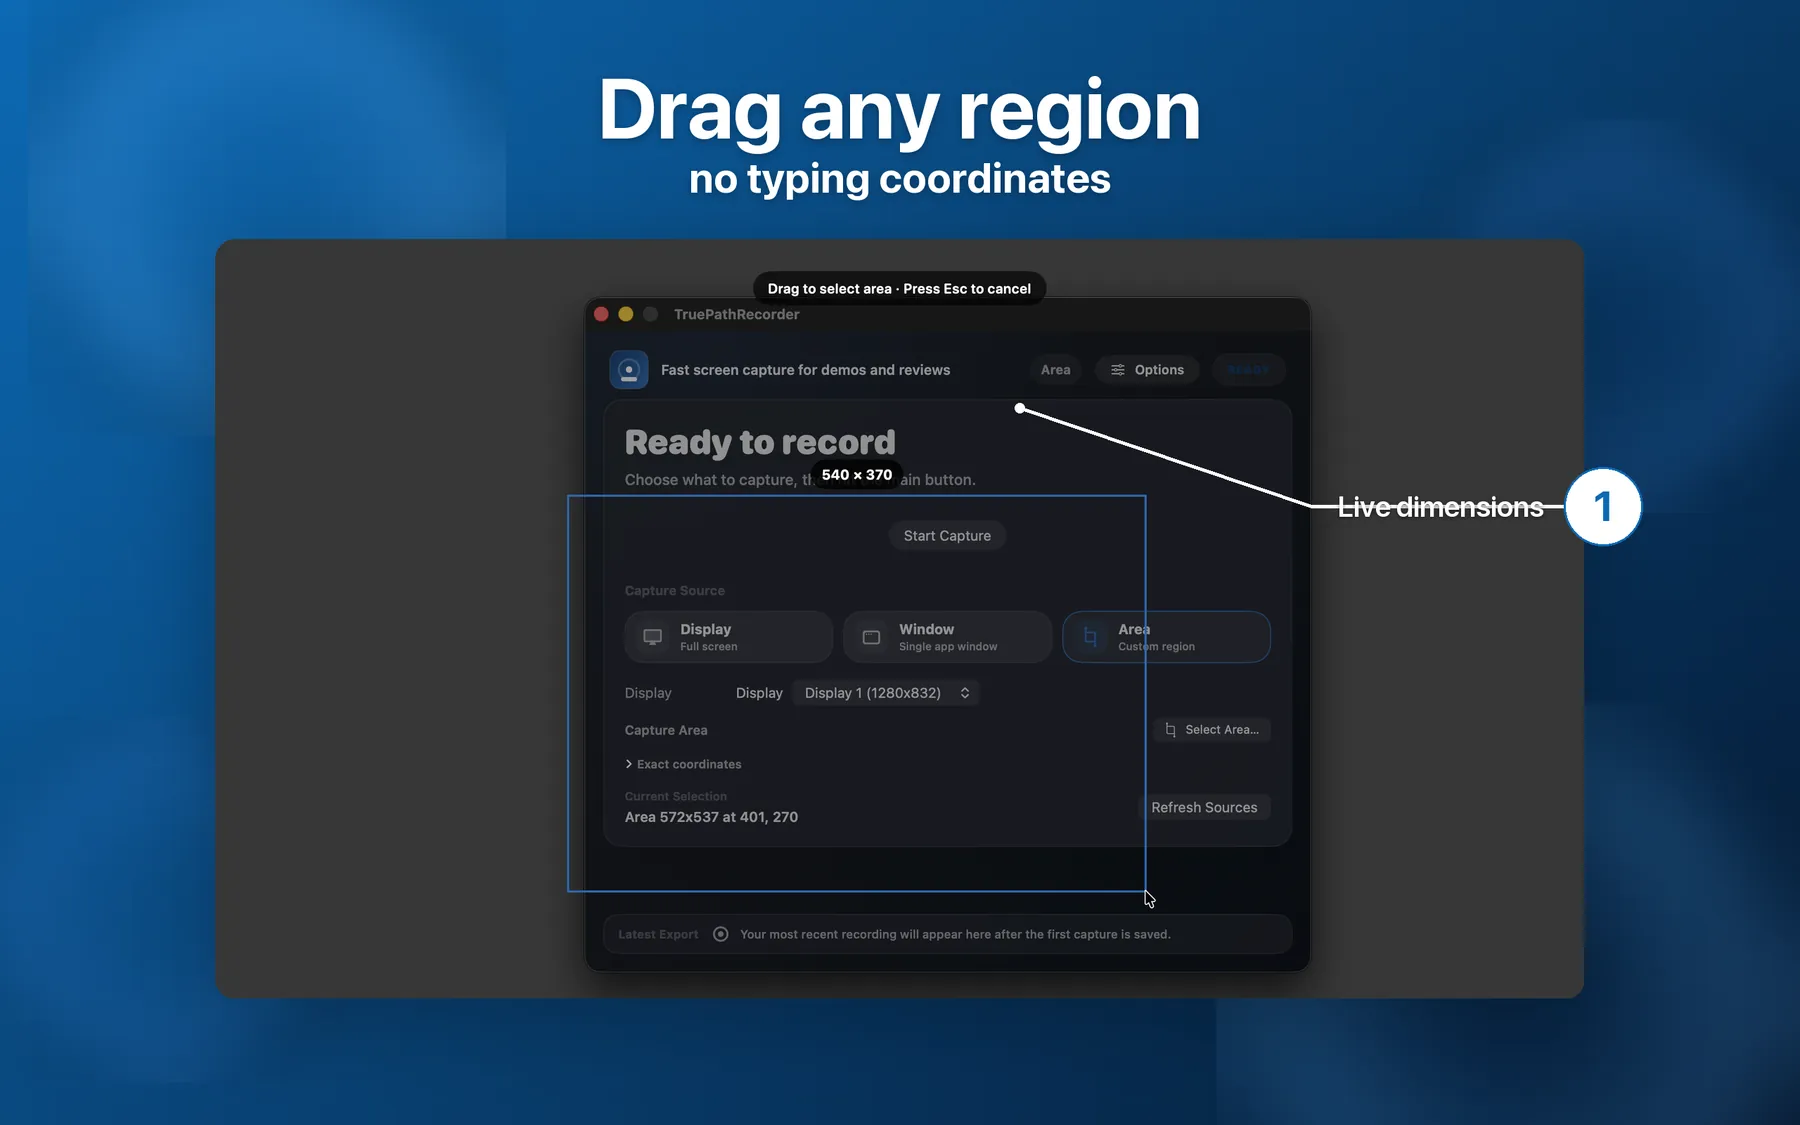
Decide what's on screen before anything else, because re-framing between takes is where consistency quietly dies. Drag a box around the part you're demoing, or grab a single window or a whole display. The detail that matters: TruePath Recorder keeps that region between recordings. Frame it once on take one and take nine lands in exactly the same place, no fiddling with the selection tool every time.
Use a countdown, not a warm-up
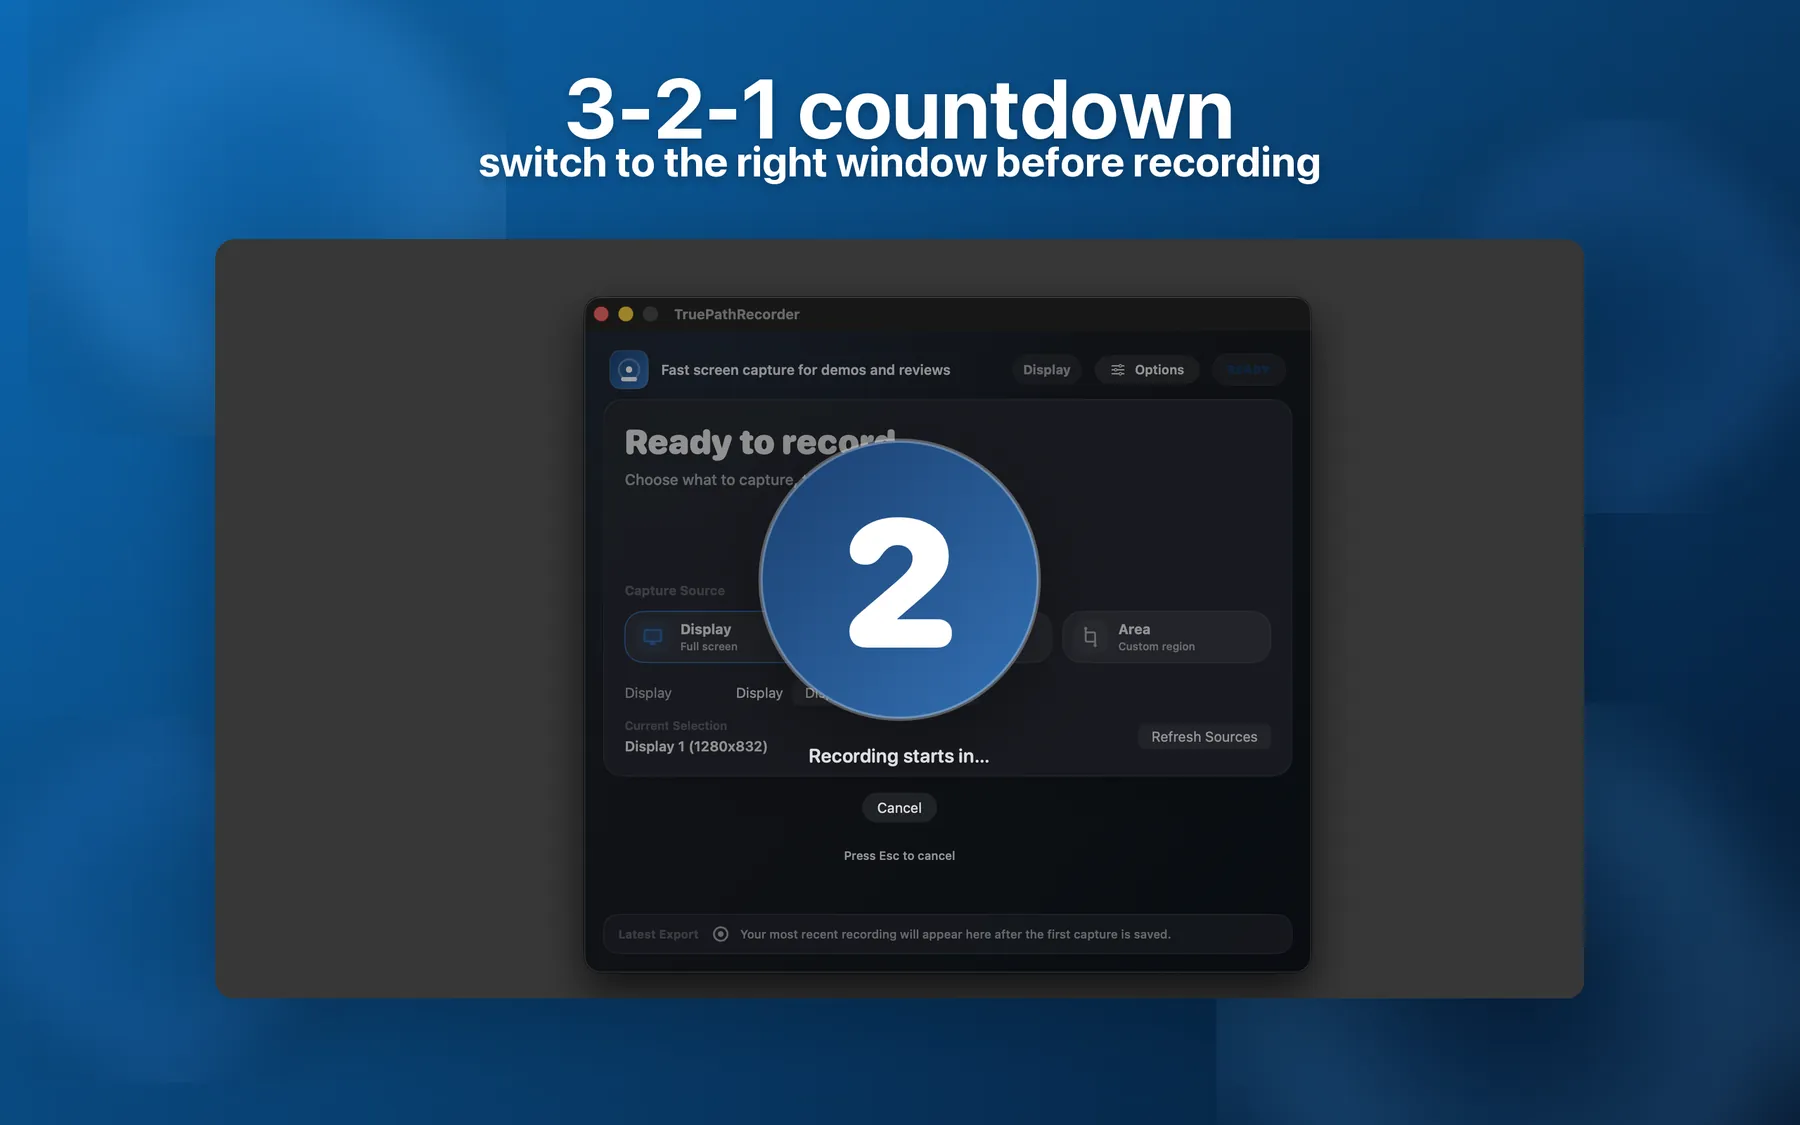
You can hear the warm-up on amateur recordings: that half-second of "okay, am I rolling" before the actual words start. A 3-2-1 overlay takes care of it. It counts you in and clears off before you say anything, so there's no messy opening to trim off the front of every clip. Small thing. You'll be grateful for it around take twenty.
Make the keyboard visible
Press Cmd-Opt-K and, as far as the viewer is concerned, nothing happened. Half the value of a software tutorial is showing what you actually pressed. Switch on the click rings and keystroke captions and your shortcuts appear on screen as you use them. Leave them off for a casual walkthrough; turn them on the second shortcuts start mattering.

Get system audio without the usual hassle
This one used to be genuinely annoying on a Mac. App sounds or video playback in your tutorial meant installing BlackHole or Loopback, routing audio through a virtual device, and hoping it survived the next macOS update. Not anymore. macOS now hands system audio to a screen recorder under the same permission as the screen itself, so a recorder that captures app audio natively just works. Flip on Include System Audio. The microphone sits on its own toggle, which is handy for the takes where you'd rather capture the screen now and narrate over it later.
Two things worth leaving on. The menu bar shows a red icon and a running timer, so you never get forty minutes deep before realizing you were still recording. And if macOS falls over mid-take, crash recovery hands the file back on the next launch. Recorder also stops itself before your disk drops under 100 MB, which is a much better outcome than a corrupt three-gigabyte file.
Trim and export while the take is fresh
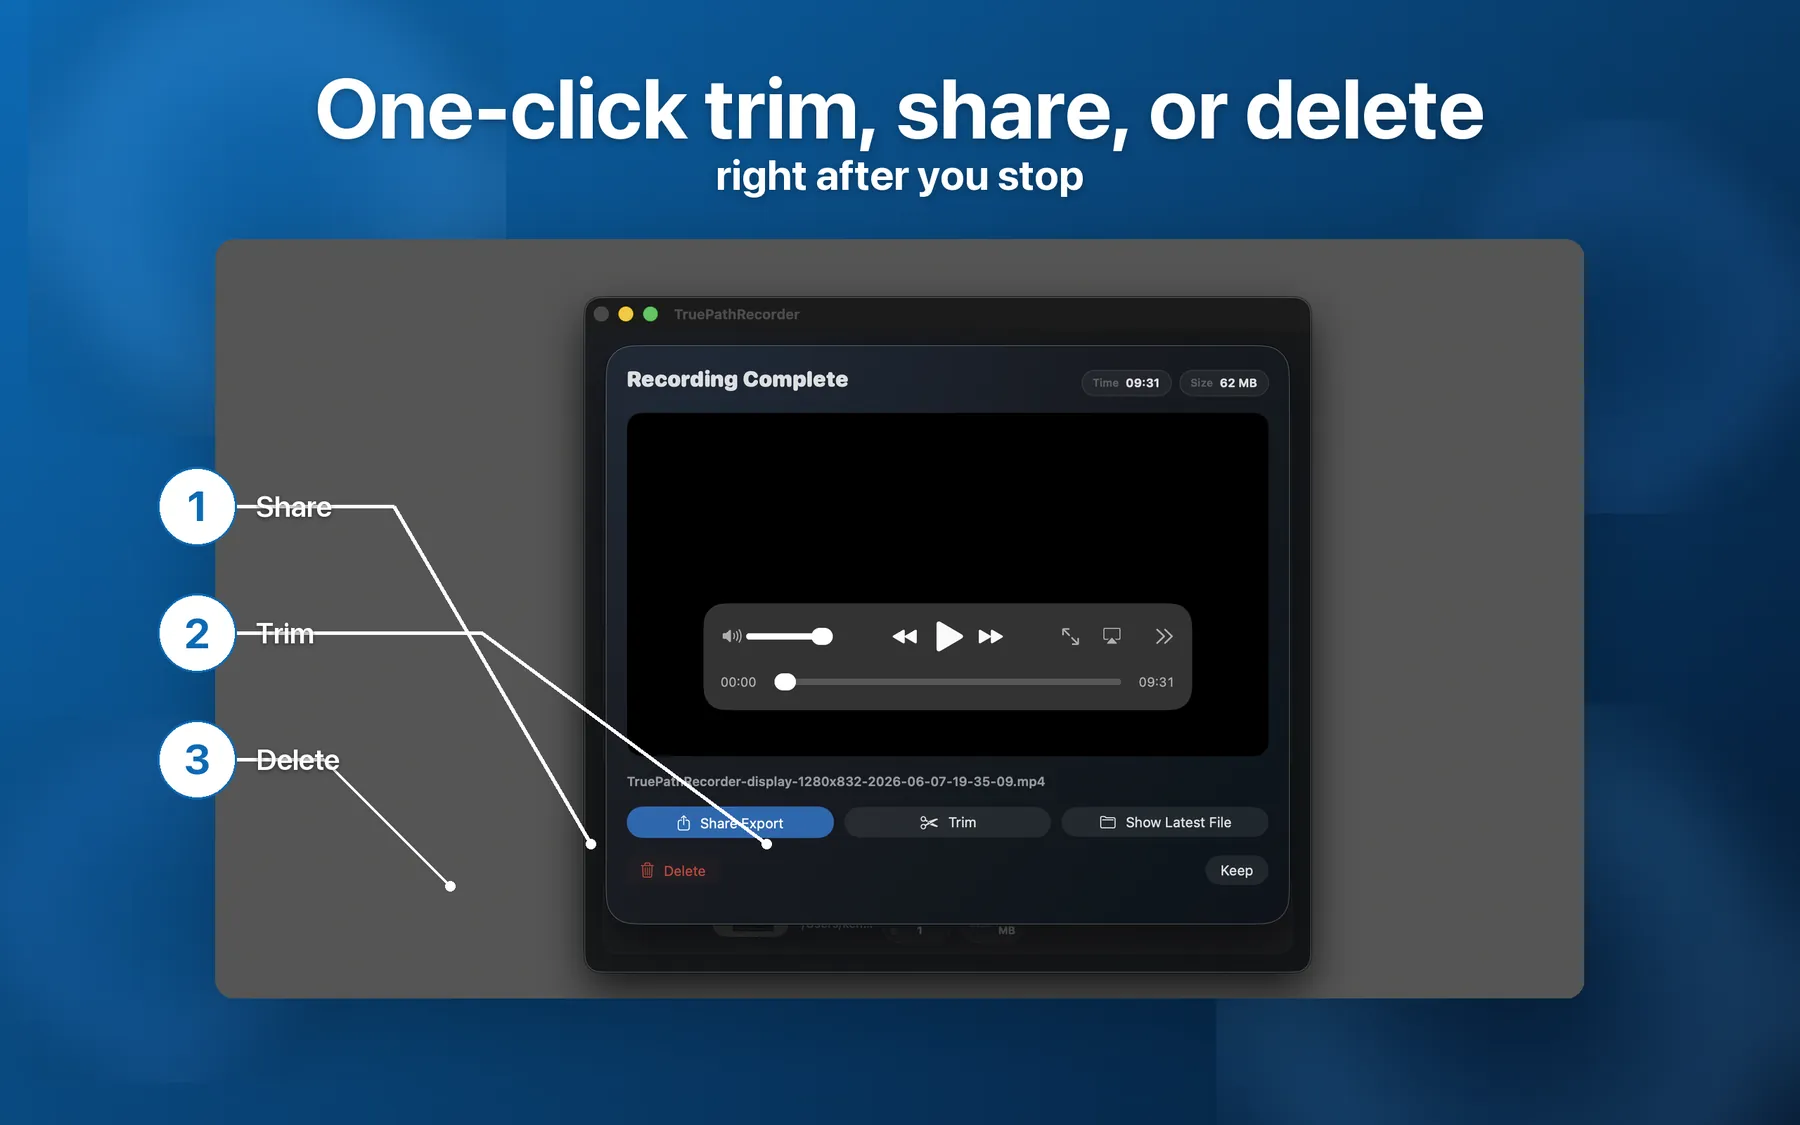
When you stop, deal with the clip right then instead of letting a graveyard of untitled.mov files build up. A sheet drops down with the take ready: trim the dead air off both ends, then save it, hand it off, or bin it if that was the bad one.
The export format is worth a minute of thought. HEVC (H.265) comes out around half the size of H.264 at the same quality. In practice that's the difference between a thirty-minute lesson uploading in a few minutes and you watching a progress bar through lunch. Recorder writes HEVC MP4 by default, and you can cap it at 1080p or 720p when you want the file smaller still.
None of this is exotic. It just adds up over a real project, where you're recording dozens of clips and any friction gets multiplied by dozens. If you make courses specifically, the tutorial-creator page goes further into the same setup.
A few things people ask
Can I record system audio without Loopback or BlackHole?
Yes. macOS covers system audio under the same permission as screen recording, so native capture needs no virtual audio device.
Will my region stay the same across takes?
It will. Set it once and Recorder reuses it until you change it.
Which export format uploads fastest?
HEVC MP4. Roughly half the size of H.264 for the same picture, with 1080p or 720p caps if you want even less.